20 Ways To Free Up Storage Space On Your iPhone and iPad
Last updated on April 5th, 2017 at 01:33 pm
Posted in How To by Vlad on November 10, 2016
iOS Low Storage Warning Messages.
This article is here to collect all tips and tricks that you can apply to free up storage on your iPhone and iPad. It will allow you to stop receiving annoying iOS warning messages like: “Storage Almost Full”, “Cannot Take Photo”, “Cannot Record Video”, “Insufficient Space For Download”, all of them being generated by the lack of free megabytes for storing new media and software. Avoid those embarrassing moments when you want to snap an important photo but your iPhone refuses to do so because there is not enough space available!
How To Check Your Storage
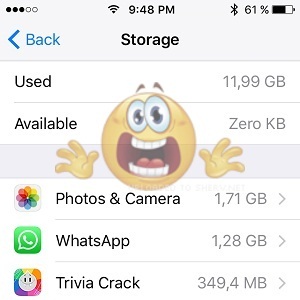 First of all, before starting to cut, erase and throw away check out the status of your device’s Storage. Grab your iPhone and tap on the Settings icon, available on the Home Screen. Hit General and browse for Storage & iCloud Usage. Dare to check the number next to the Available label. If it’s below 2 GB you have to take immediate action! Consider that a minute of 4k video recording takes up to 375 MB of storage and that a major iOS update can be as large as 2 GB, while.
Fact: In critical situations your iPhone can even display text instead of numbers next to the Available tag. If you see Zero KB displayed be careful not to shake your iPhone too hard because apps and media might start pouring out of it!
 How To Free Up Storage Space On iPhone & iPad
The first thing that you have to do when considering to free up the load on your iOS device is to check which apps are eating up the most of your storage capacity. This is easily achievable from the same Settings menu described above, by tapping on Manage Storage. The Storage screen opens up and a list of apps is displayed, in descending order. The software with the highest impact on the storage capacity is listed first. Now you can start the cleanup:
 1. Delete Photos & Videos
In most cases the Photos app eats the biggest chunk of your iPhone’s storage capacity. This makes it one of the most important source of free disk space on your iOS device. My best advice is to transfer all your Photos & Videos to your Mac or Windows computer with the help of the lightning connector. Once all images and clips are stored in a safe place you can go ahead and delete everything that’s no relevant anymore or that you don’t currently need on your iPhone or iPad. Open Photos, go to CameraRoll, tap Select (top-right corner) and drag your finger along the thumbnails to select the images that you want to get rid of.
 Tap the Trashcan icon (bottom-right corner), when ready and the files are removed.
Tip: After erasing all photos and videos you need to open the Recently Deleted album, tap on Select (top-right corner) and choose Delete All (bottom-left corner) to permanently remove the files in question. Only now is storage freed up on your device. To check how much space you won, return to the Storage view in Settings and check the Available status.
 2. Disable Photo Stream
Another trick that can instantly buy you up to 1GB of disk capacity is the My Photo Stream feature. This iOS setting is enabled by default and has the role to automatically upload new photos and send them to your other iCloud devices when connected to Wi-Fi. Apple allows My Photo Stream to sync up to 1.000 photos, thus blocking up to 1,000 MB from your storage capacity. The moment you visit Settings -> Photos & Camera and disable My Photo Stream, your iPhone will recover the blocked disk space.
 3. Optimize Your Social Media Apps
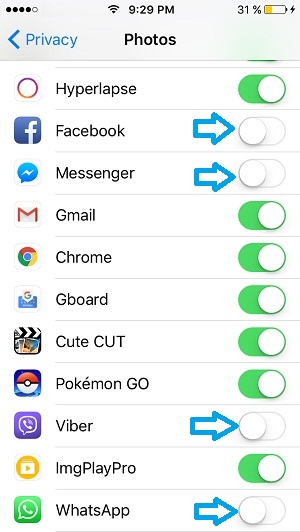
Popular social networks like Facebook, Twitter, Google+ save a lot of unnecessary data on your iPhone every time you browse them, load new profile pages and visit timelines. Considering that most of us use these apps daily imagine that a significant part of your storage space is wasted on keeping this kind of junk files. Sadly iOS doesn’t allow you to clear the cache and browsing history for these third party apps. However, you can use a simple trick to clean out your social media apps: Delete and Re-install the app on your iPhone. When the software is newly installed it comes without the temporary files mentioned above.
Fact: Be sure that you have your log-in details nearby, because you’ll have to reconnect to Facebook and all the other platforms when installing the app from scratch.
 4. Remove Content From Third Party Messaging Apps
The cross-platform software that you use for chatting with smartphone owners that aren’t using the iOS environment have also the potential of eating up a lot of storage. WhatsApp, Viber, Facebook Messenger and all similar apps save all conversations along with the media that you send as attachment. All these pile up and can occupy several Gigabytes of disk space. The fastest way of freeing up the load is by deleting and re-installing the app fresh. Most software ask you if you want to recover saved chats when you restore the app. Refuse to do so and you’ll win a lot of free space for your iPhone and iPad.
 5. Tweak The “Keep Messages” Setting
Messages is one of the stock iOS apps that isn’t gentle with your Storage either. The whole new range of iMessage features introduced with iOS 10 such as Send with effect, internal App Store and much more encourage Apple fans to use Messages more often than ever. This forces the app to expand to new dimensions and capture more and more of your iPhone’s disk space. The easiest way to keep this under control is to tweak the Keep Messages option which determines how long a chat is saved on your device.
Tip: Visit Settings, open Messages tab and scroll for Message History. Tap on Keep Messages and choose the 30 Days option. Your iPhone informs you that your action will permanently delete all messages and their attachments from your device that are older than 30 days. Tap Delete to confirm and free up space.
 6. Clear Safari Data
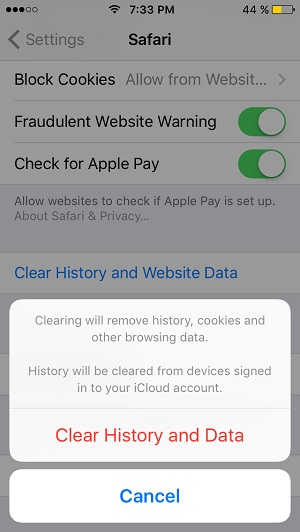
Another built-in app that can be cleaned without needing you to delete it and re-install it is the Safari web browser. Every day when you surf the web, temporary Internet files, website data and browsing history is saved and adds up to occupy more and more storage. Checking the Storage status shows you how much space Safari eats.
Tip: Open Settings and browse for Safari. Open it and scroll for the Clear History and Website Data option. Tap it and hit Clear History and Data again to confirm your deletion.
 7. Erase Unnecessary Apps
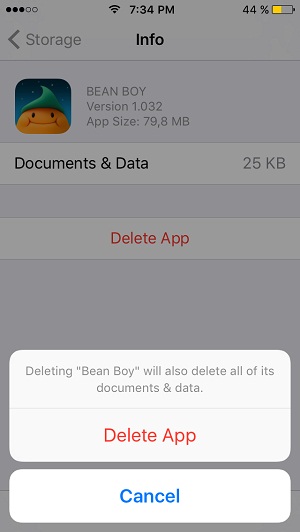
An easy and quick way of freeing up storage on your iPhone is by scrolling through the apps list available on the Manage Storage screen. Because of the multitude of applications that we download it surly happens that some will linger on your iPhone for months without you ever opening them.
Detect all apps that you don’t need anymore and delete them by tapping on the app’s label and selecting Delete App.
Fact: Don’t worry if the app was purchased. You can re-install it anytime, from the App Store, without needing you to re-purchase it.
 8. Delete Outdated Songs
Similarly to apps that you don’t use you can opt to delete tracks from the Music app, that you’re not longer listening. Sometimes we tend to download tons of music just for the sake of owning a large library. But when time comes to manage iPhone Storage you can reconsider your priorities and delete those songs that you don’t want to listen anymore.
Fact: Similar, if music is purchased, you can download it back whenever you want to if you reconsider and wish to play a tune that you previously ditched.
 9. Removed Outdated Podcasts & Videos
Another category of media files that you can ditch when it comes to freeing up iPhone storage space are downloaded podcasts and videos with the help of the respective, native iOS apps. Any show grabbed via Podcasts or movie streamed within Videos can be re-downloaded at any moment if you want to listen or watch again.
Open Podcasts and browse to the My Podcasts tab. Slide-left on the recording that you want to remove and tap the red Delete label that unveils.
 10. Remove iBooks That You Finished Reading
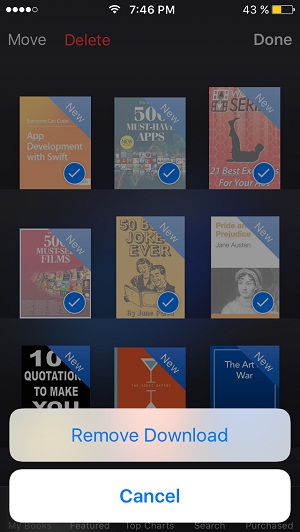
Thought that we finished with stock iOS apps? iBooks can also make room for more important files. If you have books that you’ve already read or that you lecture only on your iPad, but also get downloaded on your iPhone, remove them from your smartphone.
Open iBooks, tap on Select (top-right corner), tap the ibooks that you want to remove and hit the red Delete button, available in the top-left corner of the screen.
 11. Disable Automatic App Updates
App Store can be set to automatically download Updates that become available for third party apps that you already installed on your iOS device. Because the average iPhone can accommodate hundreds of apps your storage space can start to melt if some apps expand and are self-installing on your smartphone without your consent. Every time when you perform a manual App Store update, you’re prompted with the size of the file, thus allowing you to filter potential Storage killer apps.
 12. Avoid Camera Burst Mode
For the moment, the Burst Mode feature can’t be disabled for your iPhone’s Camera. Many of us want to deactivated it because it’s often triggered accidentally and you end up snapping a bunch of photos with the same frame. To become storage efficient you then have to open Photos and browse for the Bursts album. Open each burst in question and tap Select, available at the bottom of your screen. Choose your favorite photo by tapping the desired thumbnail. Next, hit Done and select to Keep Only 1 Favorite photo. All others will be deleted.
 13. Turn Off Keep Normal Photo Option
Yet another Photos storage tip addresses the HDR (High Dynamic Range) feature. Whenever a HDR photo is captured it blends three separate exposures to form a single high quality image.
The iPhone is set up by default to also save the normally exposed photo. This doubles the amount of disk space used when snapping a HDR image. To save only the HDR picture perform the following steps:
Open Settings -> Photos & Camera -> Keep Normal Photo and disable this setting.
 14. Use Low-Quality Image Mode
This trick also involves images. It’s about a Messages setting that allows you to attach photos in low-quality mode. Apple has introduced this feature to aid those with limited Mobile Data plans, but the setting also impacts the iPhone’s disk space. Working with low-quality images reduces the size of the photo and thus the load on the Storage.
Tip: Open Settings, tap on Messages and scroll for Low-Quality Image Mode. Enable it to save space.
 15. Trigger The iPhone’s Auto-clean Mechanism
iOS has a hidden feature that kicks-in when the disk space is really low and you’re asking the device to install an update. The iPhone can automatically clean the cache and the temporary files of its native apps to free up a few extra megabytes that allow the completion of a download or install.
There are a few visible signs when this happens. You’ll notice that the app’s icon on the Home Screen is greyed out and the Cleaning… label is displayed instead of the apps name.
Trick: There’s also a trick that you can use to force the iPhone to clear itself. First, check your available Storage. Then visit iTunes and search for a large movie like “Star Trek Beyond” or anything similar. It doesn’t matter if the film is paid because you don’t need to really purchase it. You need to make your iPhone think that you’re about to download a file that is larger than the available storage. Because the request comes from iTunes and Apple doesn’t want to lose the opportunity to sell you something, iOS will try to jump over his head to find additional disk space. After the Cannot Download warning pops up, tap on Settings and you’ll notice that your storage space has suddenly increased!
 16. Backup Photos & Videos To Google+
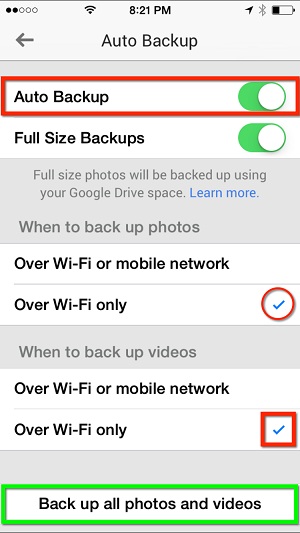
Instead of transferring your photos to your computer, to have a backup and be able to delete them from your iPhone, you can also upload them to iCloud or perform a full iPhone backup via iTunes. However, if you’re nowhere near a computer you can also quickly backup your media via the Google+ third party app.
The great thing about it is that you get unlimited storage space for images and for all videos that are under 15 minutes.
 17. Avoid Double-Storing Instagram Images
Capturing and sharing photos on Instagram can be down without saving the original picture in your iPhone’s CameraRoll. This is done by deactivating the Save Original Photos setting, which spares you from loading your iPhone’s disk space with both original frame and the edited one.
This setting is tweakable from within the Instragram app. Tap the Profile icon available in in the bottom-right corner of the footer menu. Next tap the Settings icon available in the top-right corner of your profile page. Scroll for the Save Original Photos setting and disable it.
 18. Stop WhatsApp From Saving Media To CameraRoll
Earlier I’ve shown you how to clean the media that piles up while using WhatsApp. Now you also need to know that you can prohibit the popular messaging app from saving photos and videos in your iPhone’s Photos app, thus avoiding the clutter that results from it. To achieve this open the messaging platform and tap on the Settings tab, available at the bottom of the screen. Next, hit the Chats label and deactivate the Save Incoming Media feature.
Trick: Viber also comes with a similar setting. Disable it as explained here and prevent further iOS storage problems.
 19. Backup & Restore iPhone
Last but not least you can opt to go for the hard way and perform an iPhone restore. This will clear all temporary files and caches of iOS and its native apps. To achieve this you have to connect your iOS device to a computer with the help of the original lightning connector. Backup your iPhone via iTunes first and then use the Restore iPhone button available in the same iTunes window. Ultimately select Restore from Backup sit back, relax and let the computers do their work.
 20. Use Third Party Software
If you’re ready to spend a few bucks you can combine most of the tips provided above and implement them with the help of third party iPhone cleaners that can clear Junk Files and Temporary Files at a click of a mouse button. Photos can also be easily backed-up and you can choose to maintain only compressed copies on your iPhone. Videos and other Large Files can be easily stored on your computer and then deleted to save up impressive storage space on your iPhone.