How To Install iOS 9 Developers Beta on iPhone
You have to be aware though, that installing this test version on your device, comes with a few risks and you could lose important information if you don’t follow the steps exactly as described in this post. Below you have a step-by-step guide with indications for those of you that have an Apple developer account, as well as the majority that doesn’t.
Important: Before you start make sure that you have enough free storage space on both iPhone and computer that you’ll use for updating. At least 2 GB are needed on each device. Else the process will be aborted. Delete unnecessary apps or media to free up space if needed.
Install iOS 9 Beta Without Developer Account
 When you’re a developer you have the option to register your iOS device so that Apple knows that the gadget in question belongs to a registered developer. This is done by registering your iPhone’s UDID (Unique Device Identifier). This is a 40-character-long string that is unique to every iPhone. Until now most of us thought that your smartphone had to have an UDID register, to be able to run the iOS 9 beta, but various test have shown that it works without this setting too. This is why an Apple developer account isn’t mandatory if you wish to install iOS 9 beta. This spares you $99, the yearly Apple developer fee.
Step 1: Open iTunes on your Mac or PC computer and make sure that it’s running the latest version. Connect your iPhone to your notebook or desktop via the lightning cable.
Step 2: Open the connected iPhone view in iTunes and tap on Back Up Now to backup all your files and apps. This is a precaution method, in case something goes wrong during the update process.
Step 3: In the meantime visit Evad3rs.Net and download the appropriate iOS 9 beta firmware. Do mind that each iPhone or iPad model has multiple versions. If you own an iPhone 5S for example, you need to check the back of your device to see the exact model number, i.e.: A1533, A1453 or A1457, A1518, A1528, A1530. The model number is engraved, in the lower part of the back of your device, just below the “iPhone” label.
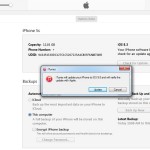
Step 4: After you complete steps 2 and 3, return to iTunes and the connected iPhone view and use the following key combo: OPTION + Click on “Check for Update” if you use a Mac, or SHIFT + Click on “Check for Update” on Windows platforms. Now, select from your desktop or the Downloads folder the file containing the iOS 9 beta firmware downloaded previously. Confirm your selection by pressing “Update”, when you receive the prompt stating: “iTunes will update your iPhone to iOS 9.0 and will verify the update with Apple.”
iOS 9 Beta Guide For Apple Developers
If you own a developer account you can download the firmware from the official source and also register the UDID of your device, to make sure that you’ll be able all future iOS betas and other developer specific software. To register as a developer visit Apple’s iOS Developer Page and click on “Enroll”.
Step 1: Is the same as in the previous guide. Open iTunes, upload to the latest version and connect your iPhone to the computer.
Step 2: Sign-in your Apple developer account, or register for one. Hit the iOS 9 beta link and select the exact device model that it will be installed to. The software can run on iPhones from 4S onwards, all tablets from iPad 2 and up, iPad minis and iPod touch (5th generation).
Step 3: Extract the “.ipsw” file from the download package and place it on your desktop.
Step 4: Return to iTunes on your computer, select the connected iPhone view and use the same key combo described above: OPTION + Click on “Check for Update” for Mac, or SHIFT + Click on “Check for Update” on PC.
Step 5: Select the “.ipsw” file placed on your desktop and tap on “Update” to confirm your pick!

