How To Enable Critical Alerts For Selected Apps In iOS 12

iOS 12 Glucose Monitor critical alert.
Nevertheless, there are certain alerts that you don’t want to miss by any means. I’m talking about third party apps that come from healthcare providers and share vital information for your health like the Glucose Monitor. These entities are allowed to code the “Critical Alerts” feature withing the apps, which is an opt-in option that is curated and only approved by Apple after a review.
How To Enable iOS 12 Critical Alerts
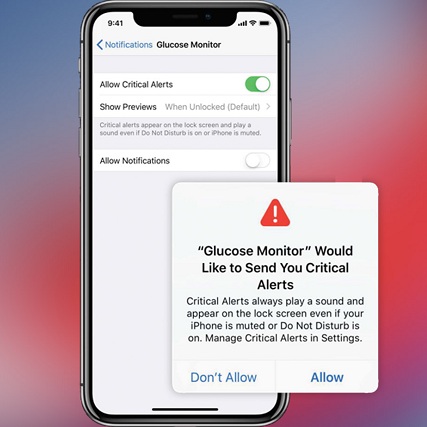 If an app that you download comes with this special alert feature it will prompt you to provide permission for it, the same way you’re asked for consent when an app requires access to your iPhone’s camera, microphone and so on. For example, a Glucose Monitor app might prompt you to accept these vital notifications by the following prompt: “Critical Alerts always play a sound and appear on the lock screen even if your iPhone is muted or Do Not Disturb is on. Manage Critical Alerts in Settings” along with two options “Don’t Allow” and “Allow”.
If you accidentally decline this permission don’t worry, there is another way to manually enable Critical Alerts. Here is what to do:
1. Open Settings from your Home Screen.
2. Tap on Notifications.
3. Scroll and search for the app that you want to enable Critical Alerts for and tap it.
4. At the top of the screen, tap the knob next to the Allow Critical Alerts label.
Fact: Because these notifications are considered very important they have the power to bypass the Do Not Disturb mode and will alert you even if the iPhone is muted. Speaking of Do Not Disturb, do you know that it has also been enhanced in iOS 12? Tap here to read what’s new!
Tip: Do you know that you can track the amount of notifications that your iPhone / iPad receives each day, along with the app’s that issue these alerts. Screen Time is the feature that provides all this data.