Raise to Listen and Send Audio iMessages
Last updated on April 22nd, 2015 at 11:10 am
Posted in How To by Vlad on October 25, 2014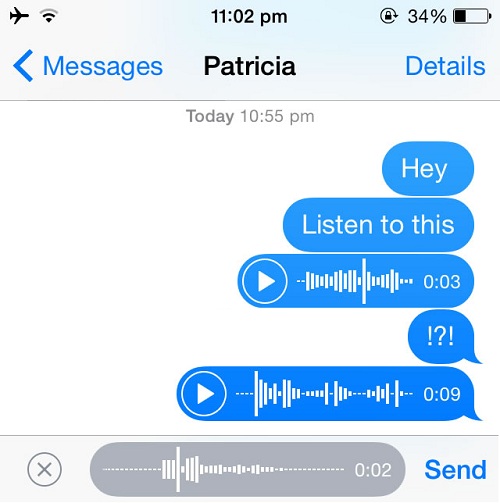
Recording via Raise to Listen.
As we already covered this subject, in an earlier posting, you might be aware of the fact that Raise to Speak isn’t available anymore. It’s function has been partially replaced by the Hey Siri trick.
However, it doesn’t have the same success yet, because the functionality is limited, for now, by the plug in condition.
 How To Enable Raise to Listen
For this gesture shortcut to work you need to activate it first:
– This is done by accessing ‘Settings’;
– scroll and tap on ‘Messages’;
– next, scroll again until you reach the ‘Raise to Listen’ ON/OFF switch.
If it’s not active, tap it and it will switch to the right and turn green. This way you know that your tweak was successful. Whenever you wish to disable, repeat the process.
How To Use Raise To Listen
This gesture shortcut has two functions, both of them become active when your iPhone opens a Message conversation screen. If you just received an audio message from a contact you can listen it by bringing your iPhone to your ear, using the same motion that you use when you answer a call. You can also reply or be the one that sends the first audio message by performing the same gesture. Bring the iPhone to your ear and you’ll hear a short beep sound. That’s the sign that the audio recording has started. Once you finish speaking, lower your device and the communication will be instantly sent.
Raise to Listen Tips & Tricks
After playing around with this feature we come up with a few suggestions:
 1. Avoid Embarrassment: When you record a message via the Raise to Listen shortcut, it will be automatically sent to your contact. So, if something embarrassing is recorded by accident, you might find yourself in a tricky situation! However, we noticed that if you make the recording long enough, iOS asks first you if you wish to ‘Send’ or ‘Discard’ the audio capture. If you accidentally record something embarrassing simply keep the iPhone glued to your ear, until your capture exceeds a duration of 15 seconds. This will ensure that you’ll be prompted with options and prevent iOS to send the message automatically.
 2. Extend Validity: Audio iMessages are set ,by default, to expire within ‘2 Minutes’. After enabling Raise to Listen, please check the ‘Expire’ setting. I recommend you to select ‘Never’ as validity period. Else, you risk that your iMessage will expire and become unavailable to your chat partner, until he is able to listen. I don’t even know why they provide the ‘2 Minutes’ expiration time frame as an option. It makes using audio iMessages pointless. However, if you have long audio conversations, do remember to delete them from time to time and to free up your iPhone’s memory.
 3. Audio Messages:
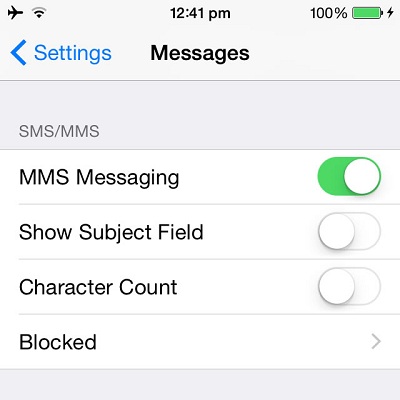
Raise to Listen is mainly designed to be used with iMessages. However, the feature also works with normal carrier Messaging option, if you active MMS on your device. For this please visit Settings -> Messages -> MMS , switch ON.
Note, that sending an MMS usually implies additional carrier costs if you don’t have free MMSes included in your plan. You can read more details about sending audio messages via FaceTime.