How To Send / Receive Money With Apple Pay Cash In Messages
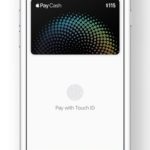
Next, you have to set up the Apple Pay Cash service via the Wallet app. Open it from your iPhone’s or iPad’s Home screen and tap on the new Apple Pay Cash Card that’s available. Go through the setup process and you’re ready to go. The service can also be activated from the Settings app. Browse for Wallet -> Apple Pay -> Apple Pay Cash and enable the service with the help of the On/Off toggle.
Apple Pay Cash Requirements
- Before you start you have to know that currently the service works only within the United States. You also need to own a credit / debit card and a social security number.
- Not all iPhones are compatible. You need to own an iPhone 6 or later to be able to send money via iMessages.
- Two-factor authentication must be turned on on your device.
- You must be at least 18 years old to be able to send & receive payments via Apple Pay Cash.
 How To Add Money To The Apple Pay Cash Card
1. Open the Settings app.
2. Browse for Wallet & Apple Pay.
3. Tap on the Apple Pay Cash card
4. Select the amount you want to top up. $10 is minimum, $3,000 maximum.
Tip: From the same interface you can add a Bank account. After that you’ll also be able to withdraw funds from the Apple Pay Cash card.
How To Send / Receive Money With Apple Pay Cash
 With the card loaded you can start sending money. Here is how to:
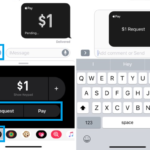
1. Open the Messages app and chose an available conversation thread or start a new conversation with a contact that’s also from the iOS platform. (The service works only via the iMessage system.)
2. Tap the App Store icon near, available next to the text input field.
3. Use the Apple Pay icon to bring up the Apple Pay Cash interface.
4. Enter the amount you want to send / receive with the help of the + / – icons or directly from the keyboard.
5. Choose if Request or Pay depending on your part within the transaction.
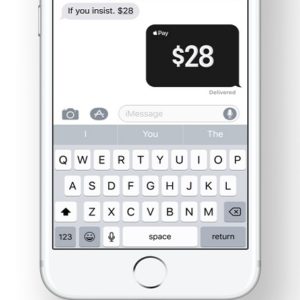
6. Preview your Payment or Money Request.
7. Tap the blue arrow to send or request your money via an iMessage.
Facts:
- 1. If you’re the sender, you’ll see the money listed as pending, in the Wallet app, until your chat partner accepts the payment. You can cancel the transaction anytime until its accepted by the receiver. Once the funds are claimed, the transaction is listed in the Apple Pay Cash Card history.
- 2. If you’re on the receiving end of the transaction, funds are added to the Apple Pay Cash Card. You can use the money to pay wherever Apple Pay is supported or withdraw the funds to your bank account.
Apple Pay Cash Identity Verification
If you’ll use the service often and reach a combined transfer sum of more than $500 you’ll have to verify your identity. This is done from Settings app as follows:
1. Browse for Settings -> Wallet & Apple Pay.
2. Tap on Apple Pay Cash card.
3. Hit Verify Identity.
4. Confirm your legal name and provide the last 4 digits of your SSN (Social Security Number). Date of birth is also needed. Last but not least you have to provide a photo of your driver’s license or state ID card.
Fact: Verified Apple Pay Cash member can hold as much as $25,000 on the Apple Pay Card!
Limitations:
- As a verified user, you can add a maximum of $10,000 to your Apple Pay Cash card within a week. However, you’ll need multiple transactions for that because the top up limit per transaction is $3,000.
- The minimum threshold for sending / receiving money is $1. Maximum $3,000 but not more than $10,000 per week.
- Withdrawing cash to your bank account has limits between $1 and $3,000, with not more than $20,000 per week.
Tip: Apple Watches running watchOS 4.2 are also Apple Pay Cash compatible. We’ll update you soon about how to send and receive money via iMessages, directly from your wrist!

