Camera App Provides New Professional-Quality Filters In iOS 11

Camera Filters screen in OS 10 vs iOS 11.
The 9 available Camera filters in iOS 11 are: Vivid, Vivid Warm, Vivid Cool, Dramatic, Dramatic Warm, Dramatic Cool, Mono, Silvertone, Noir. Some of them sound and look similar with the eight available in iOS 10 or older versions: Process, Transfer, Instant, Fade, Chrome, Mono, Tonal, Noir but here is where resemblances stop. In iOS 11 the filters aren’t previewed in a grid version like users were used to. They’re available within a scrubber displayed at the bottom of the Camera viewfinder.
How To Use iPhone Camera Filters
 1. Grab your iPhone or iPad and open the Camera app from the Home Screen, Control Center or via the Lock Screen gesture.shortcut.
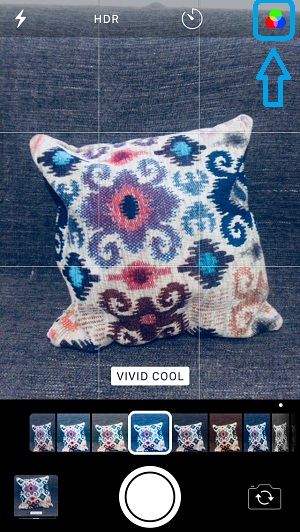
2. Tap the Filters icon available in the top-right corner of the Camera app.
Fact: The option is only available if Camera is in Photo, Square or Portrait Mode.
3. Swipe or drag the Filter scrubber to preview and select the desired color change.
4. Tap the Shutter button to snap a filtered photo!
Fact: The new Filters view allows users to quickly switch between filters and capture a picture. In the previous iOS versions you had to select your filter first from a grid that did not contain the shutter button to provide immediate frame capture opportunity.
More: iOS 11 uses a revolutionary image compression technology that allows you to shoot photos at the same quality but using half of the storage space needed before!