How To Downgrade iOS 9 Public Beta 1
iOS 9 Public Beta 1 is a really successful release. The battery draining issue that was the most annoying flaw of the initial developers test versions, has been fixed and more so, the iPhone seems to have a better power performance, while running the public beta, compared to iOS 8.4, even without activating the Low Power Mode. However, there are still a few bugs left and more important, plenty of third party apps that crash, or don’t run at all with this 9th iOS generation.
Downgrade From iOS 9 Public Beta 1 To iOS 8.4
Follow this step-by-step guide and you’ll be back running the official iOS version within 20 minutes. The procedure keeps all your media and apps, as long as you have an iTunes backup of your device!
 Step 1: Make sure that the latest iTunes version is installed on your computer (Mac or Windows).
Step 2: Plug-in your iPhone and link it to your computer via its USB lightning cable.
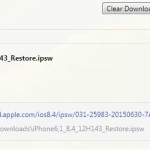
Step 3: On your computer, download the iOS 8.4 ipsw (firmware), from the official download links shared at the end of this article. Make sure that you select the appropriate package for your iOS device.
Step 4: On your iPhone, go to Settings -> iCloud and scroll for the Find My iPhone feature. Disable it or the restoring process won’t work. It’s a safety setting that protects your device if it’s lost or stolen.
 Step 5: Go to iTunes, on your computer, and switch to the tab displaying the connected iPhone. Press the ‘Option’ key on Mac (or ‘Shift’ Key on Windows) + Click the ‘Restore iPhone’ button.
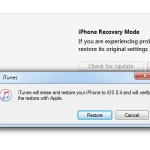
Step 6: Select the previously downloaded firmware package and click ‘Restore’ to confirm your selection.
Be patient! iTunes will work its magic and install iOS 8.4 on your mobile device. After the downgrade is completed, you have one more step to complete:
Step 7: On your computer, choose if you wish to set up your iPhone as a new device (with factory settings and all data erased), or if you wish iTunes to sync your latest backup and restore all your apps, media and other settings! If you pick the second option, which I recommend, iTunes will need your patience again until all data is restored to your gadgest. The more apps you have, the longer it will take.
Apple’s iOS 8.4 Download Links
Here you can find a list with the direct download hyper-links for the iOS 8.4 firmware packages. Select the one matching your device. Do mind, that the files are up to 2 GB large. Make sure you have enough storage on your computer. iTunes will also need extra free space, when you begin with the downgrade process in order to deploy and perform the restoration!
iPhone 4S
iPhone 5 (CDMA)
iPhone 5 (GSM)
iPhone 5C (CDMA)
iPhone 5C (GSM)
iPhone 5S (CDMA)
iPhone 5S (GSM)
iPhone 6
iPhone 6 Plus
iPad Air 2 (6th gen. WiFi)
iPad Air 2 (6th gen. Cellular)
iPad Air (5th gen. WiFi + Cellular)
iPad Air (5th gen. WiFi)
iPad Air (5th gen. CDMA)
iPad (4th gen. CDMA)
iPad (4th gen. GSM)
iPad (4th gen. WiFi)
iPad mini (CDMA)
iPad mini (GSM)
iPad mini (WiFi)
iPad mini 2 (WiFi + Cellular)
iPad mini 2 (WiFi)
iPad mini 2 (CDMA)
iPad mini 3 (China)
iPad mini 3 (WiFi)
iPad mini 3 (Cellular)
iPad 3 Wi-Fi (3rd gen.)
iPad 3 Wi-Fi + Cellular (GSM)
iPad 3 Wi-Fi + Cellular (CDMA)
iPad 2 Wi-Fi (Rev A)
iPad 2 Wi-Fi
iPad 2 Wi-Fi + 3G (GSM)
iPad 2 Wi-Fi + 3G (CDMA)

