How To Share Your Name And Photo With Contacts In Messages iOS 13
Last updated on October 25th, 2021 at 04:57 am
Posted in How To by Patricia on September 20, 2019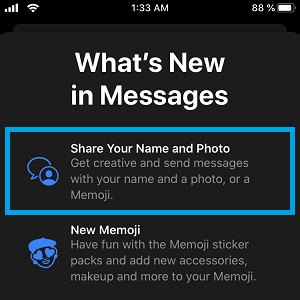
iOS 13 Messages Share your Name and Photo feature.
To be able to share your name and photo within Messages you have to make sure that you use your Apple ID in both iCloud and iMessage and that you are signed in in both apps. If you’re using your Apple ID in iCloud and your phone number in iMessages, this new feature can’t be activated. You’ll have to update the iMessages settings and use your Apple ID instead of the phone number as detailed below!
How To Setup Name And Photo in Messages
 After you finish upgrading to iOS 13, simply open the Messages app and follow the steps described below:
1. On the Messages home screen, tap the icon with three blue dots, that’s available, at the top, on the right, next to the “New Message” icon.
2. Select “Choose Name and Photo”.
3. For Photo you can edit a custom photo or create a Memoji that represents you.
4. Select your Display Name and hit Continue.
5. Choose who will be able to see your new Name and Photo. You have two options: ‘Contacts Only’ or ‘Always Ask’. The first one will automatically share your updated name and photo data the next time you message someone from your contacts. The second options requires punctual access from your for every contact that you chat with.
How To Fix ‘Sharing Name and Photo Not Available’ Problem
 If you’re following the steps described above and all of the sudden a pop up is displayed on the screen informing you that the feature isn’t available, don’t panic! Here is what you have to do in order to make it work. In most cases the problem arises when you’re not signed up in iCloud or iMessages, or when the iMessages account is different from the iCloud one.
1. Make sure that you signed up with your Apple ID in iCloud.
Open Settings and tap on the first Apple ID label. Make sure that you’re signed in with your current Apple ID.
2. Check the account set for iMesages
-> Open Settings and scroll for Messages
-> Tap on Send & Receive and make sure that you Use your Apple ID for iMessage and not your phone number.
3. Return to Messages and set up your Name and Photo for sharing.
Related: Want to find out more about iOS 13? Have you tried the built-in slide to type keyboard?
It’s a pity you don’t have a donate button! I’d most certainly donate to this excellent
blog! I suppose for now i’ll settle for bookmarking and adding your RSS
feed to my Google account. I look forward
to fresh updates and will share this site with my Facebook group.
Talk soon!